
Dopo aver installato la virtual machine con Windows Server 2022 possiamo passare alla configurazione del RRAS (Routing and Remote Access Service) Server.
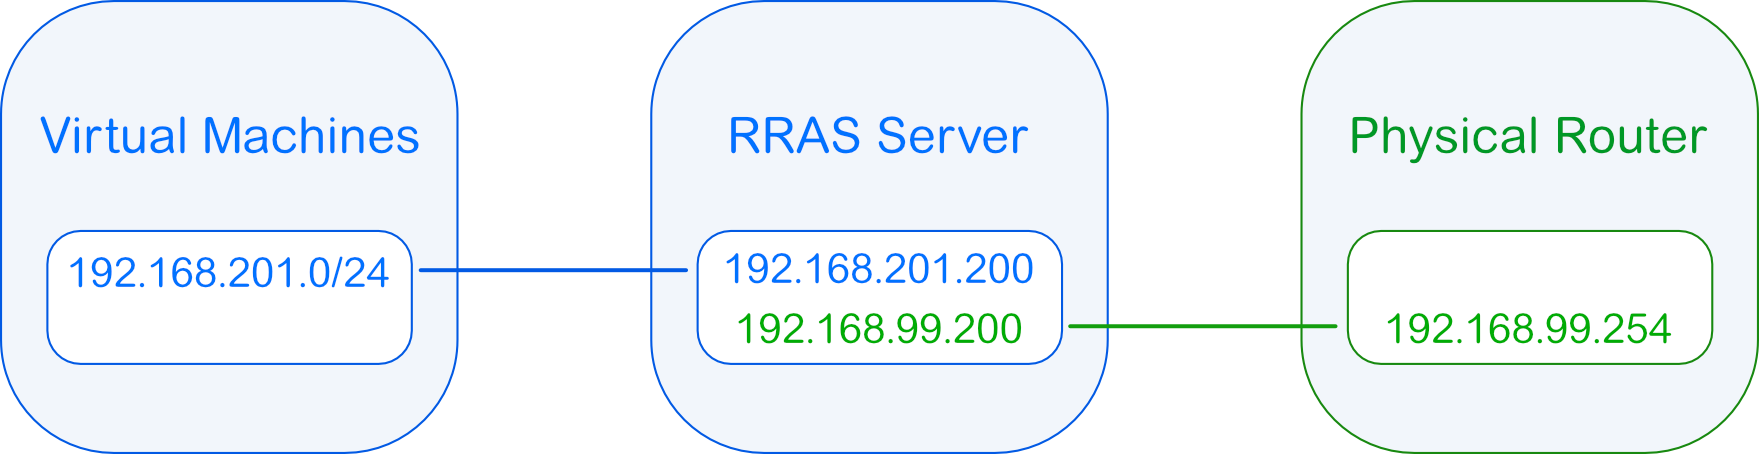
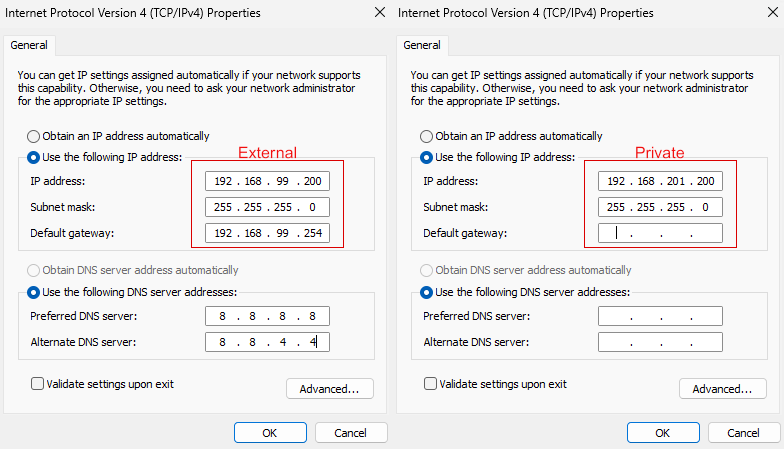
Come abbiamo visto nel precedente articolo la macchina ha due schede di rete, queste andranno configurate con un indirizzamento Privato dedicato alla nuova infrastruttura e uno Esterno per il collegamento al Router fisico, il quale fornirà l’accesso a Internet:
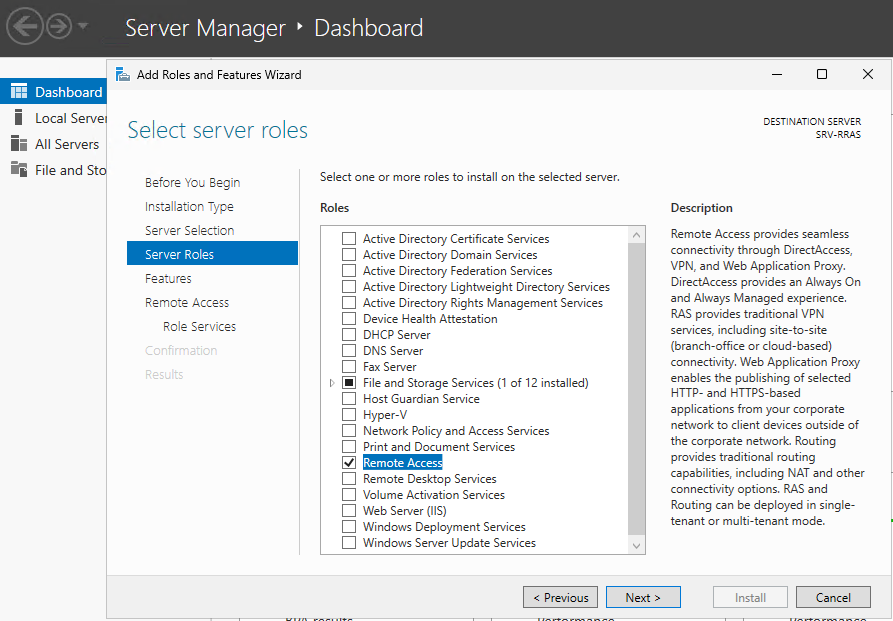
Tramite Server Manager passiamo ora alla configurazione dei Ruoli necessari, nello specifico dobbiamo abilitare Remote Access, i servizi necessari (DirectAccess and VPN e Routing) e i componenti di IIS. Quanto non indicato in maniera esplicita può essere lasciato con i parametri di default:

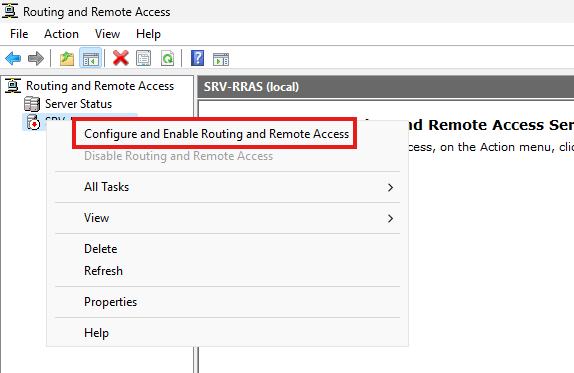
Dobbiamo ora procedere alla configurazione tramite il pannello Routing and Remote Access:

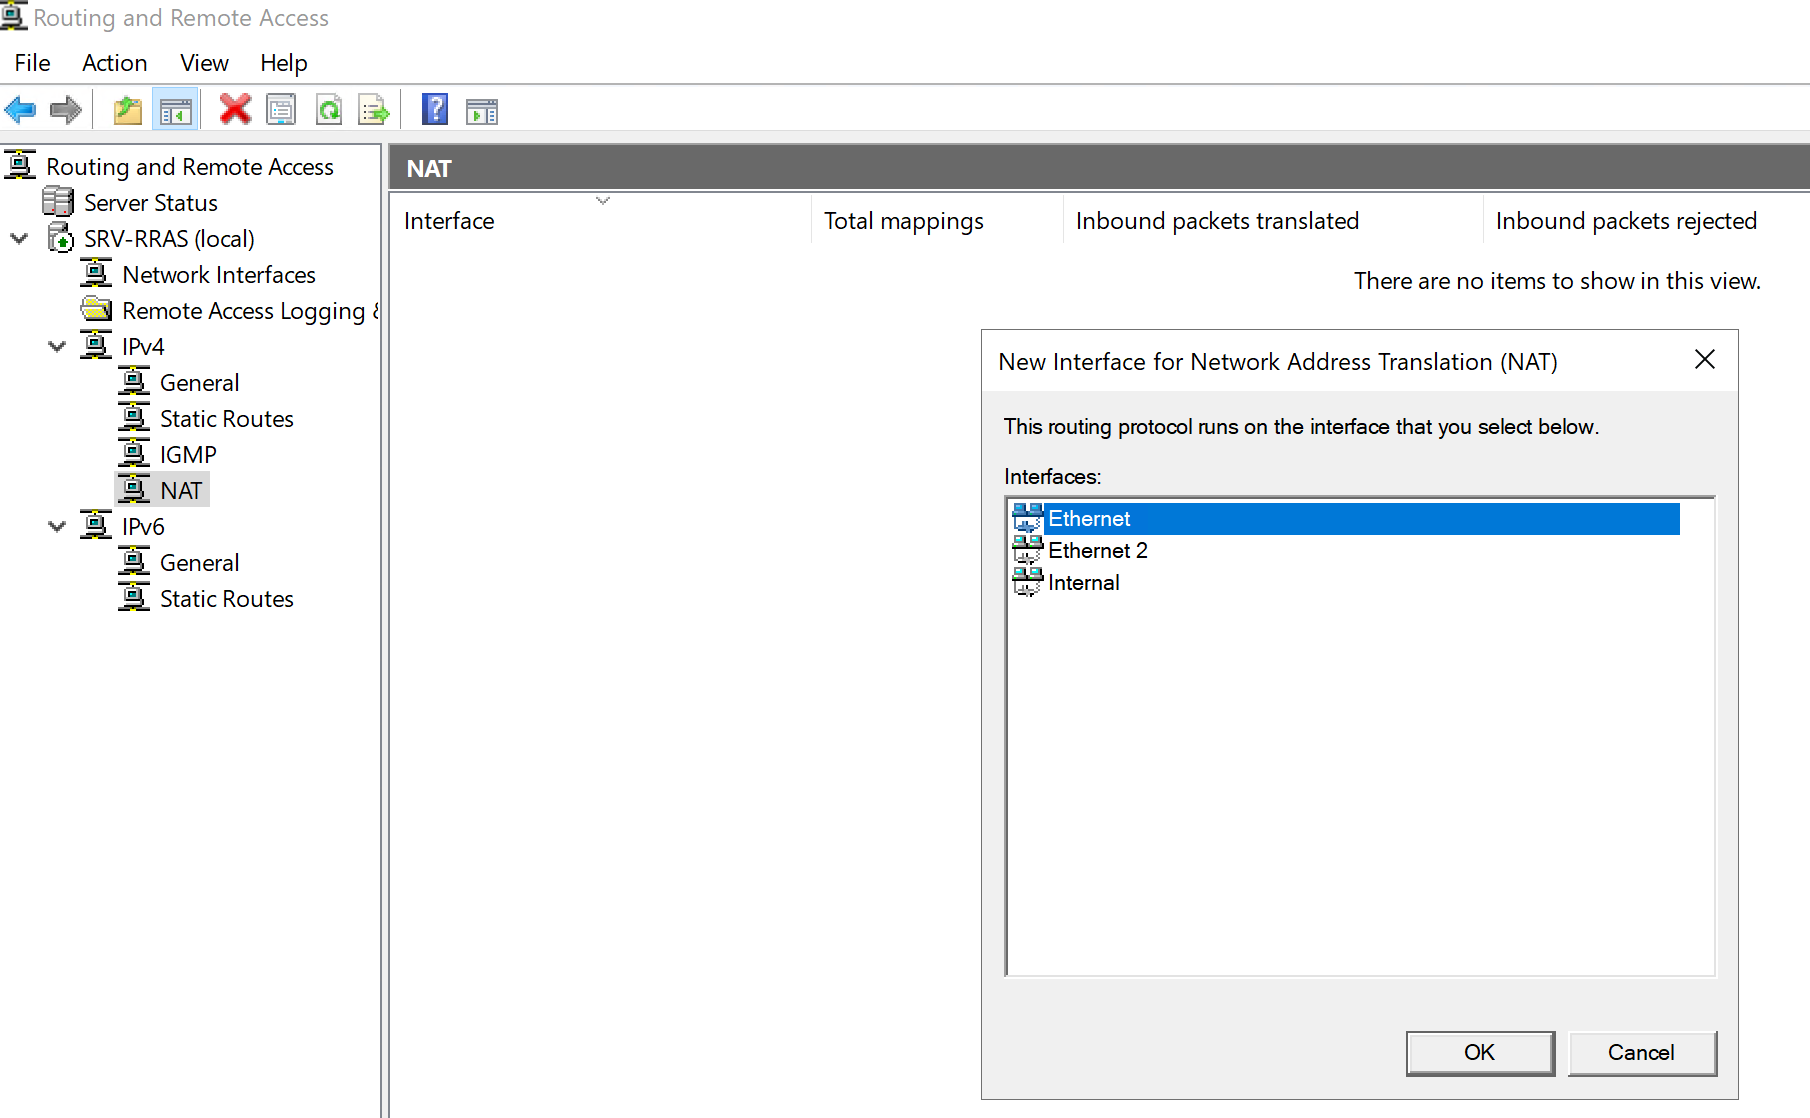
Dopo l’attivazione del servizio dobbiamo iniziare a configurare le interfacce, come anticipato avremo bisogno di una External e di un Private.
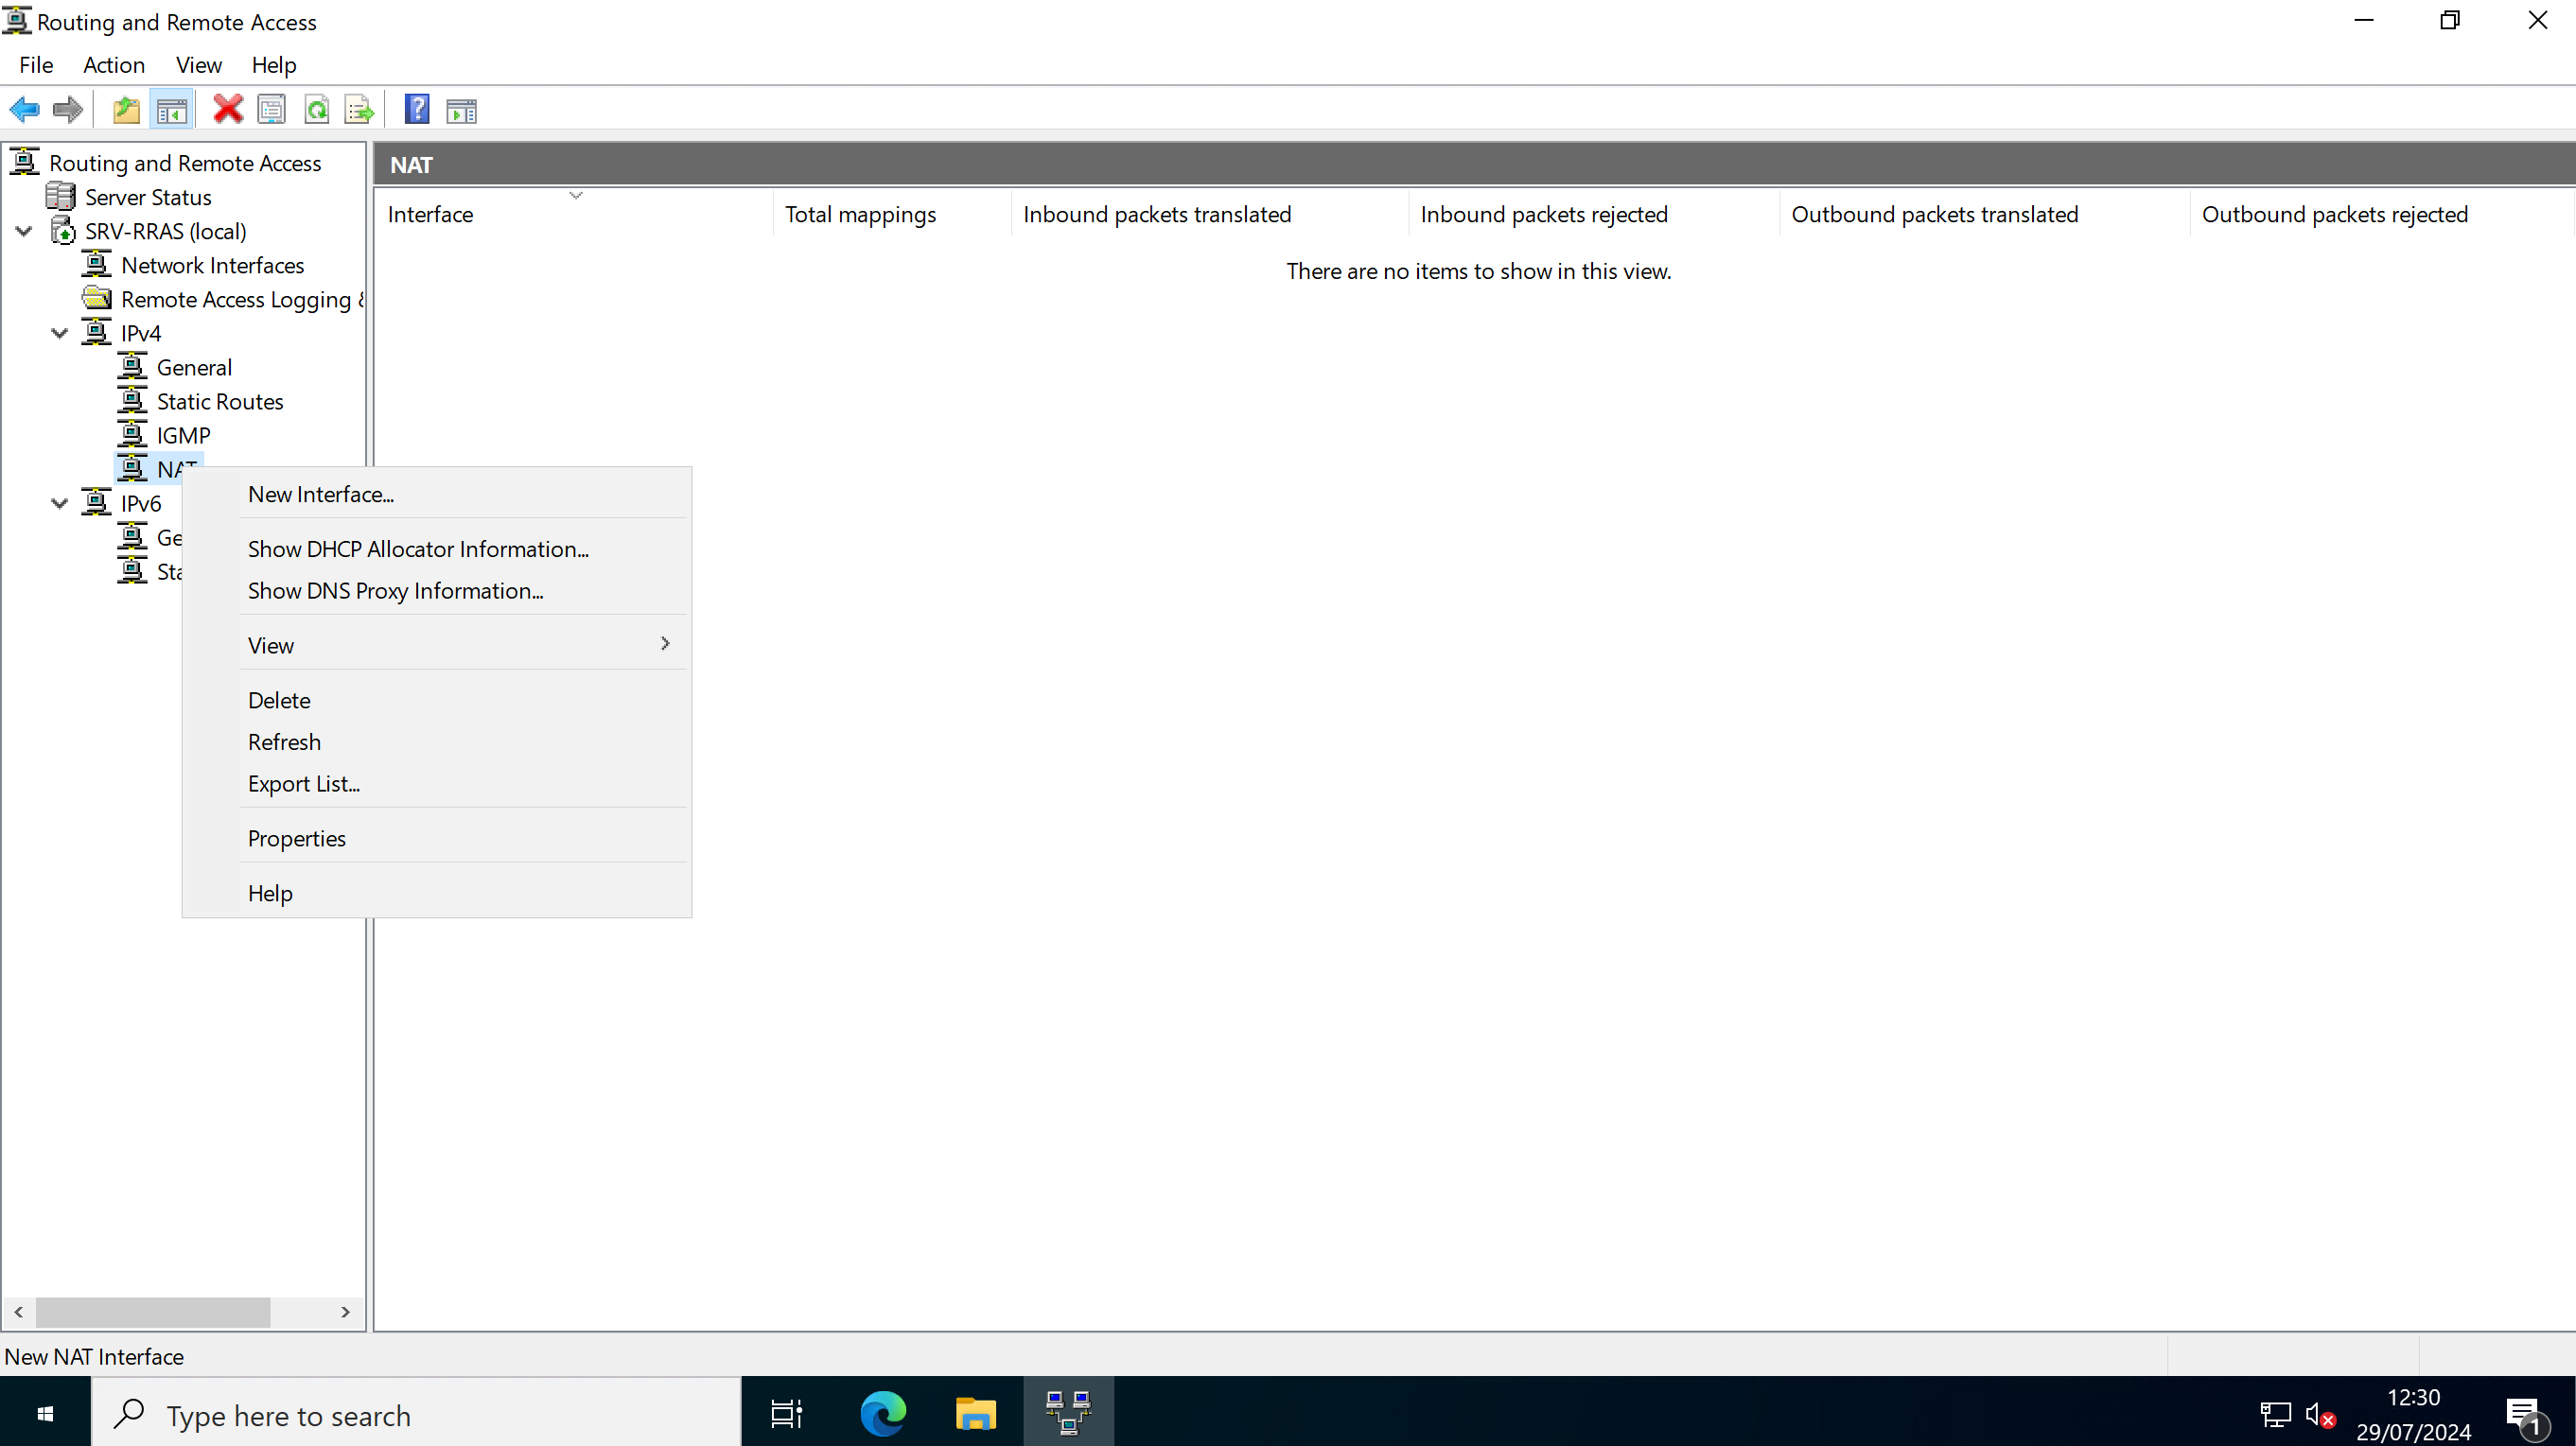
Con il tasto destro sulla voce NAT di IPv4 cliccare su New Interface:
Nel nostro sistema al virtual switch external è associata la scheda “Ethernet“, potrebbe chiamarsi in altro modo, l’importante è che sia quella con accesso a Internet.
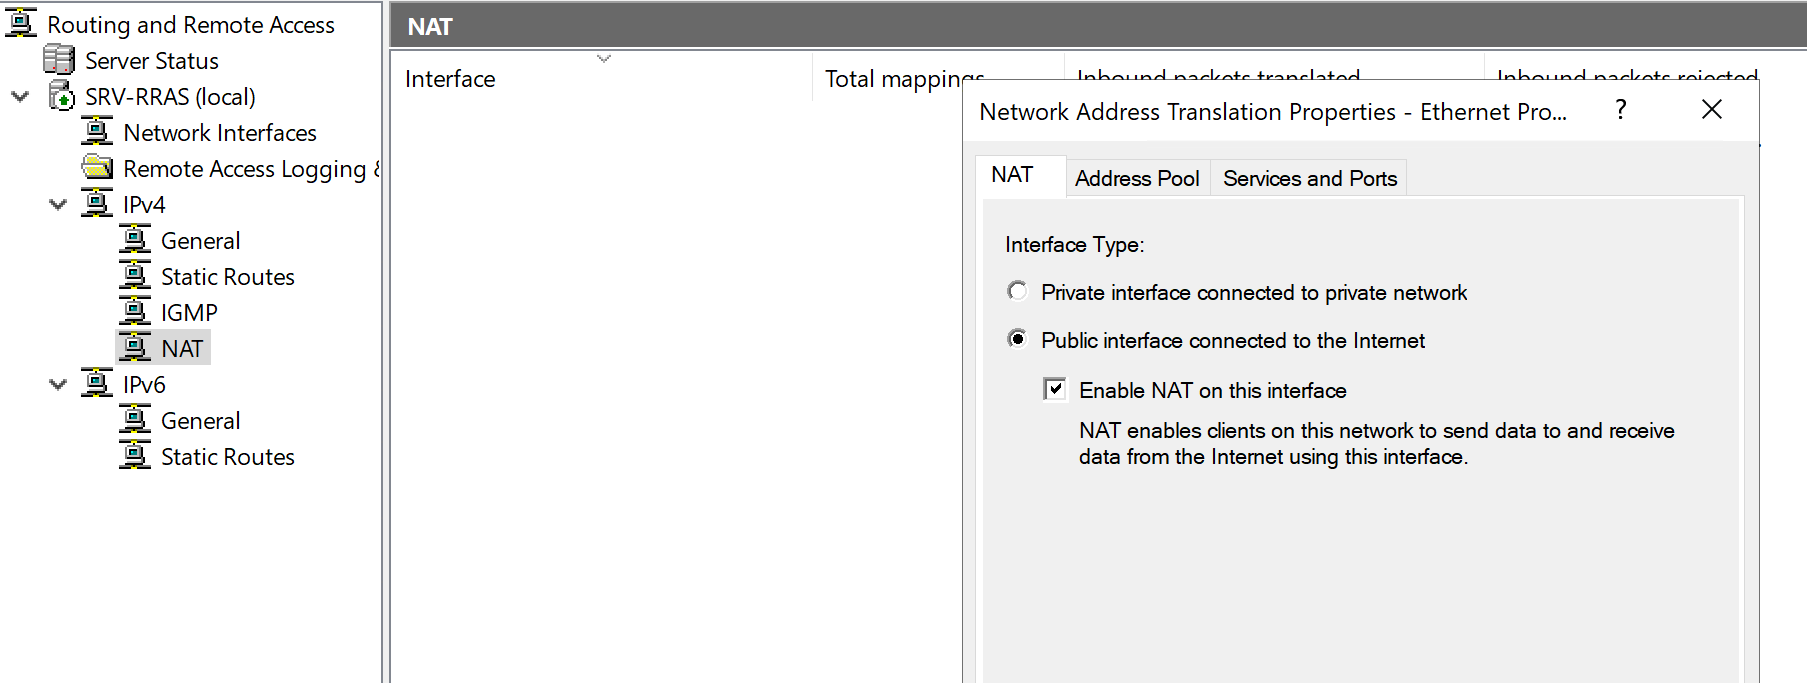
Una volta selezionata la tipologia dovremo riscordarci di spuntare anche la voce “Enable NAT on this interface“:
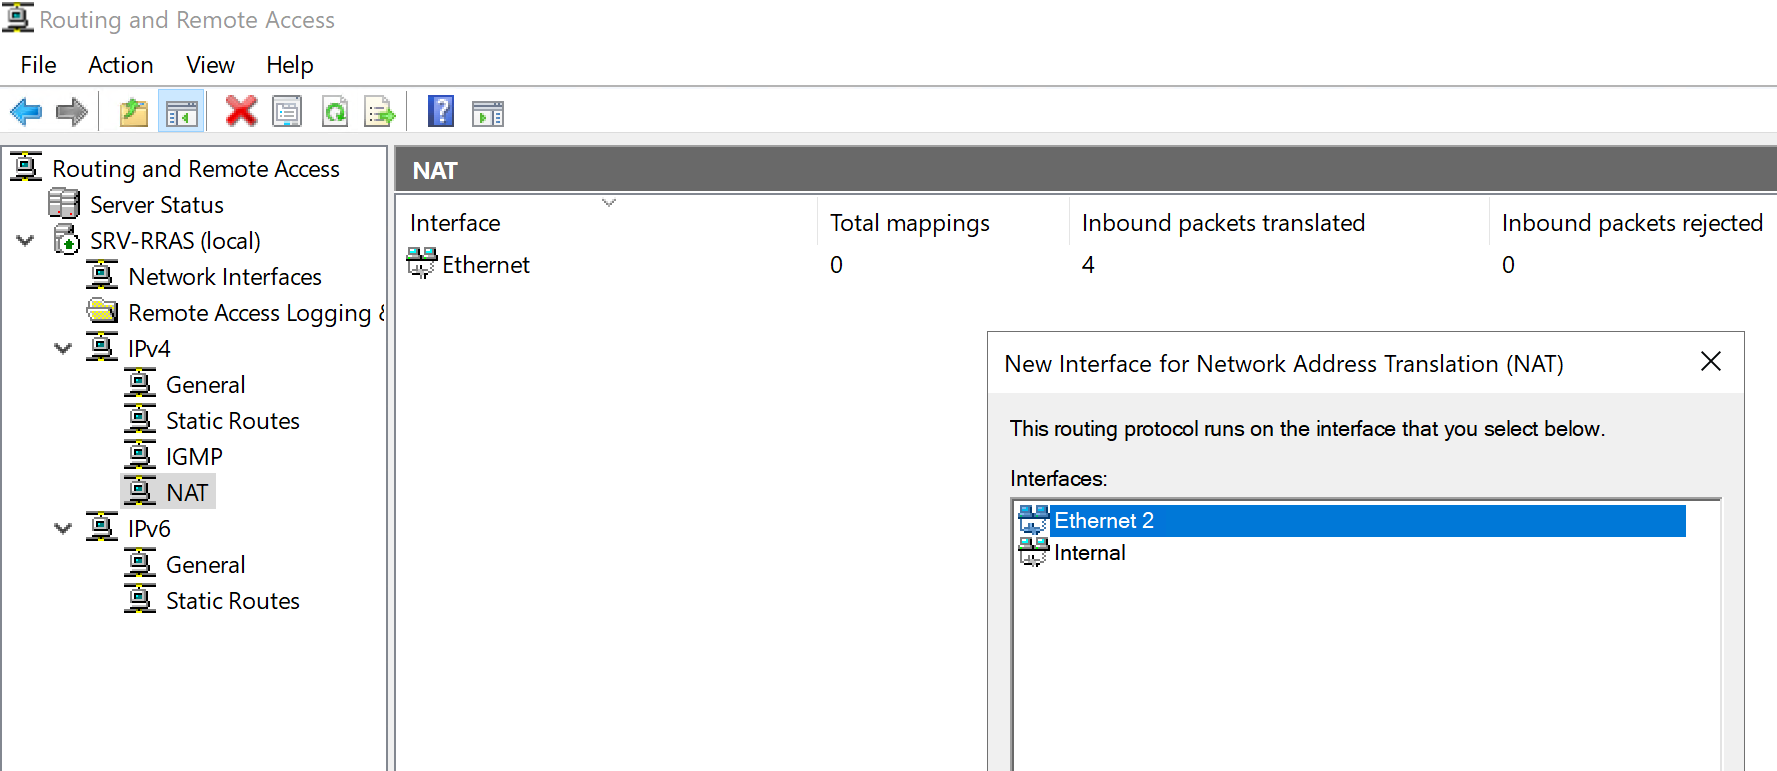
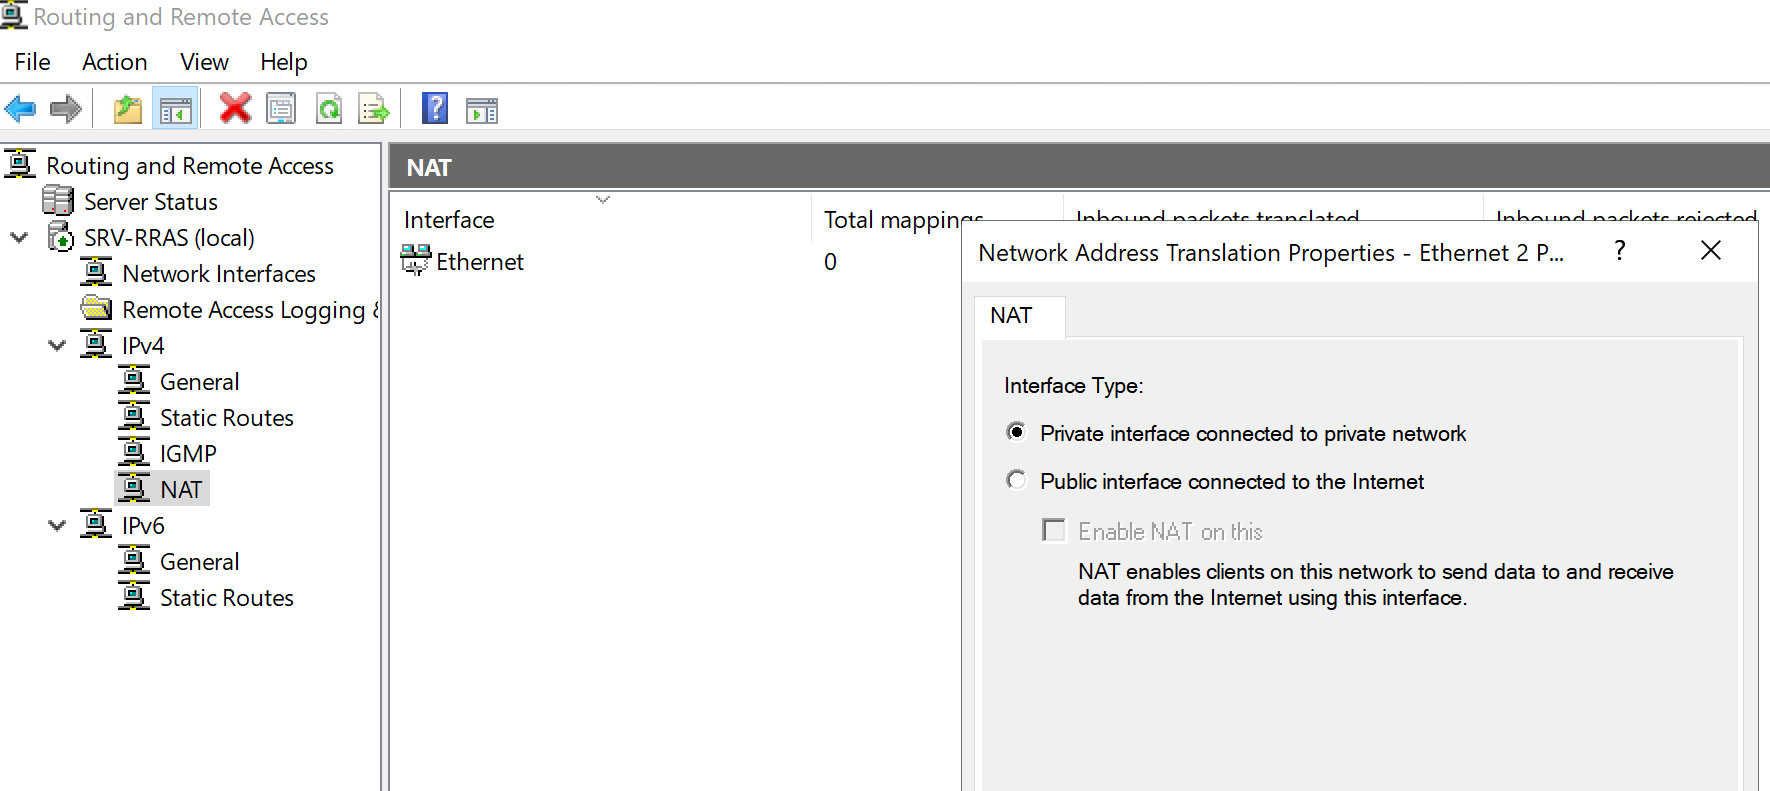
Terminiamo la configurazione impostando anche l’interfaccia private, che nel nostro caso è “Ethernet 2“. Nel tab relativo al NAT, selezionare la voce “Private interface…”
Da questo momento tutte le richieste di comunicazione esterna passeranno attraverso RRAS, che tradurrà gli indirizzi IP e consentirà la connettività a Internet.
Categories: All Azure Azure Arc Cloud HomeLab Hyper-V Sistemi Windows